
Capturing The Southern California Horizon With Lukas Griffin

For more than a decade, I have been able to call Southern California home. Over the years, I have discovered much about myself and the art which I would like to produce. I am inspired by people interacting with their natural surroundings, enjoying the free moments in time and doing the things that they love to do most. It was the landscape of California shaped that passion and allowed me to embark upon my unique evolution as an artist. In today’s article, I would like to share how I capture the horizon in Southern California.
Click here to view the artwork featured above: No Time - Topanga Canyon, California.
Sunrise & Sunset - Watching the sunrise is such a breathtaking moment in time. Hues of light stretch across the sky and the sun slowly begins to rise again in the distance. Arguably, one of the best locations to view and capture the horizon at sunrise is of course by the sea.
The result is exquisite imagery, but the process of capturing an idyllic shot can be rather a challenge. This is even more true if you head to your shoot unequipped with knowledge. It’s a known fact amongst photographers that shooting before and after sunrise allows for the variable details and tones to be seen in an image.
At this time of day, lighting is almost never overexposed. However, the fact remains that there will be many points in the day where the lighting is too harsh to shoot. This is especially true when shooting at a beach in Southern California. So, scheduling a shoot before and after the rising of the sun will be one of your best chances of capturing that indefinite horizon ahead.
From experience, you’ll have a window of around an hour or two, dependent on your location and if there are any covering clouds in the sky. In California, if there are any clouds, it is fair to presume that they will not linger for long, especially during the summer months. If there are next to no clouds, you will most definitely have under an hour to continue your shoot. After this time has passed, the lighting will be too bright to capture an evenly exposed image.
One of my favorite shots in this category can be seen above. Notice how the hues of blue, pink, white and subtle hints of yellow ooze into one block of color. Careful planning and shoot scheduling allowed for me to capture this such a beautiful landscape with its true colorway intact.
Alternatively, if you’re hoping to capture a glimpse of the sunset within your collection of California pictures, I’d recommend setting up your equipment at least one hour before the sun is due to set. This way, you’ll be ready and in place to capture the golden hour, breaking across the sky, just in time to watch the sunset due west.
Foreground, Middle Ground & Background - Now if you’re a photographer who has brushed up on their reading, you’ll have heard of the ‘rule of thirds’ before. One of the typical rules in this guide that I like to abide by is as follows:
Whenever I’m out shooting, no matter my location, I sometimes find it really useful to think about the elements in my image before I begin taking any shots. Typically, I like to have around three or so elements within my images to ensure that my collection of prints are aesthetically pleasing to the eye.
Capturing California pictures makes this task a breeze as the scene of a beach in this location is naturally picturesque, but for this rule to work sufficiently, I also like to consider the subject(s) of an image alongside the landscape. Then, I tie these elements together and there you have it - a finalized photo.
If there was a surfer walking along the shore, for example, this subject could act as the foreground for your image rather nicely. The crashing waves would act as the middle ground and the distant horizon would set the scene with a picturesque background.
‘Nomad -Malibu, California’ is an example of how this guide could be used when visiting California beaches as a general rule of thumb. If you’re wondering where to place capture the subject(s) in your image, imagine drawing out a tic-tac-toe design, with two lines running vertically and two horizontally. Try to place your subject(s) where these lines meet; for example, to top left or top right or bottom left or bottom right of your images.

Click here to view the artwork featured above: West - Southern California.
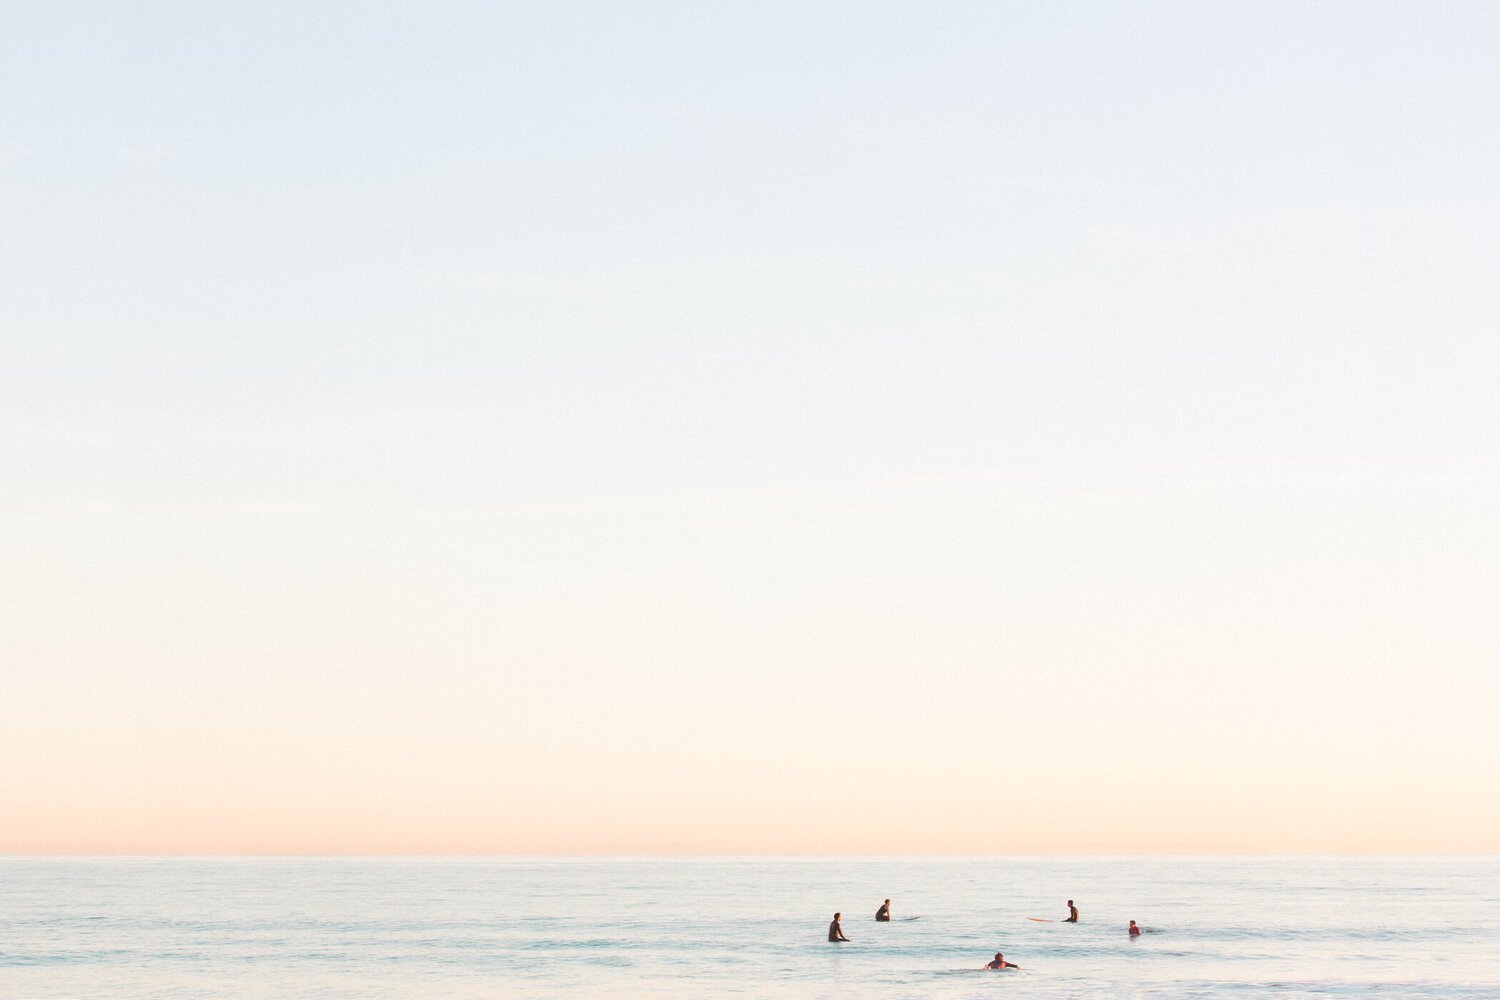
Depth of Field - To include as much as the scenery possible, I would suggest carrying a lens which allows you to shoot from a long depth of field. Using a more closed off aperture will allow the depth of field to become longer, causing the f-stop to set at a higher number. Ultimately, this approach enables addition subjects within your image to come into focus, even from a distance.
Usually, I like to find myself a nice vantage point within my shooting location, but this is all the more important when shooting from a distance. If you are shooting in this way, you’re going to want to aim for clarity. That means crisp clear shots. Of course, it is entirely up to you whether you would like the background of your image to remain in focus, but I usually like to keep my images as clear as possible so that the stories of each individual can be captured.
You can see in the example above how long-distance shooting with a longer depth of field can be beneficial to capture the scene in its entirety. The above photo was taken from the sands of a beach in Southern California. All surfers and swimmers remain fully focused and in-tact within this image.
It should be said that above all else, the feeling that from a shot’s potential always resides closer to my approval than the written guidelines for photography. Of course, it is always useful to understand guidelines such as the ‘rule of thirds’ so that you can refer to them when you need to, but the best rule that you could follow no matter where your camera points, is to shoot from the heart.
For me personally, I feel at my happiest when I am capturing the true essence of being free and this is something which I wanted to convey within my collection of pictures taken at a number of California beaches.
So, that concludes my guide to capturing the horizon in Southern California. I hope that you have found this article both intriguing and useful from a photography standpoint.
If you are an art curator, looking to expand the collection of California pictures in your home, you can view the artworks featured within this article using the links provided.
If you’d like to keep up to date, feel free to visit my Instagram page @lukasgriffin for further examples of my photography work.
PHOTO CREDITS
All photos used within this article are courtesy of Lukas Griffin.
All images are available to purchase as prints, view all collections.